Setup Guide
Set up noctune’s core workflow with these eight essentials. Follow them in order or jump to the feature you need.
Record or upload audio
Choose New Encounter in the top bar or Start an encounter on the Dashboard. Select the patient and templates, then choose Record from web or drop in an existing audio file. Nothing is processed until you submit the queued recording.
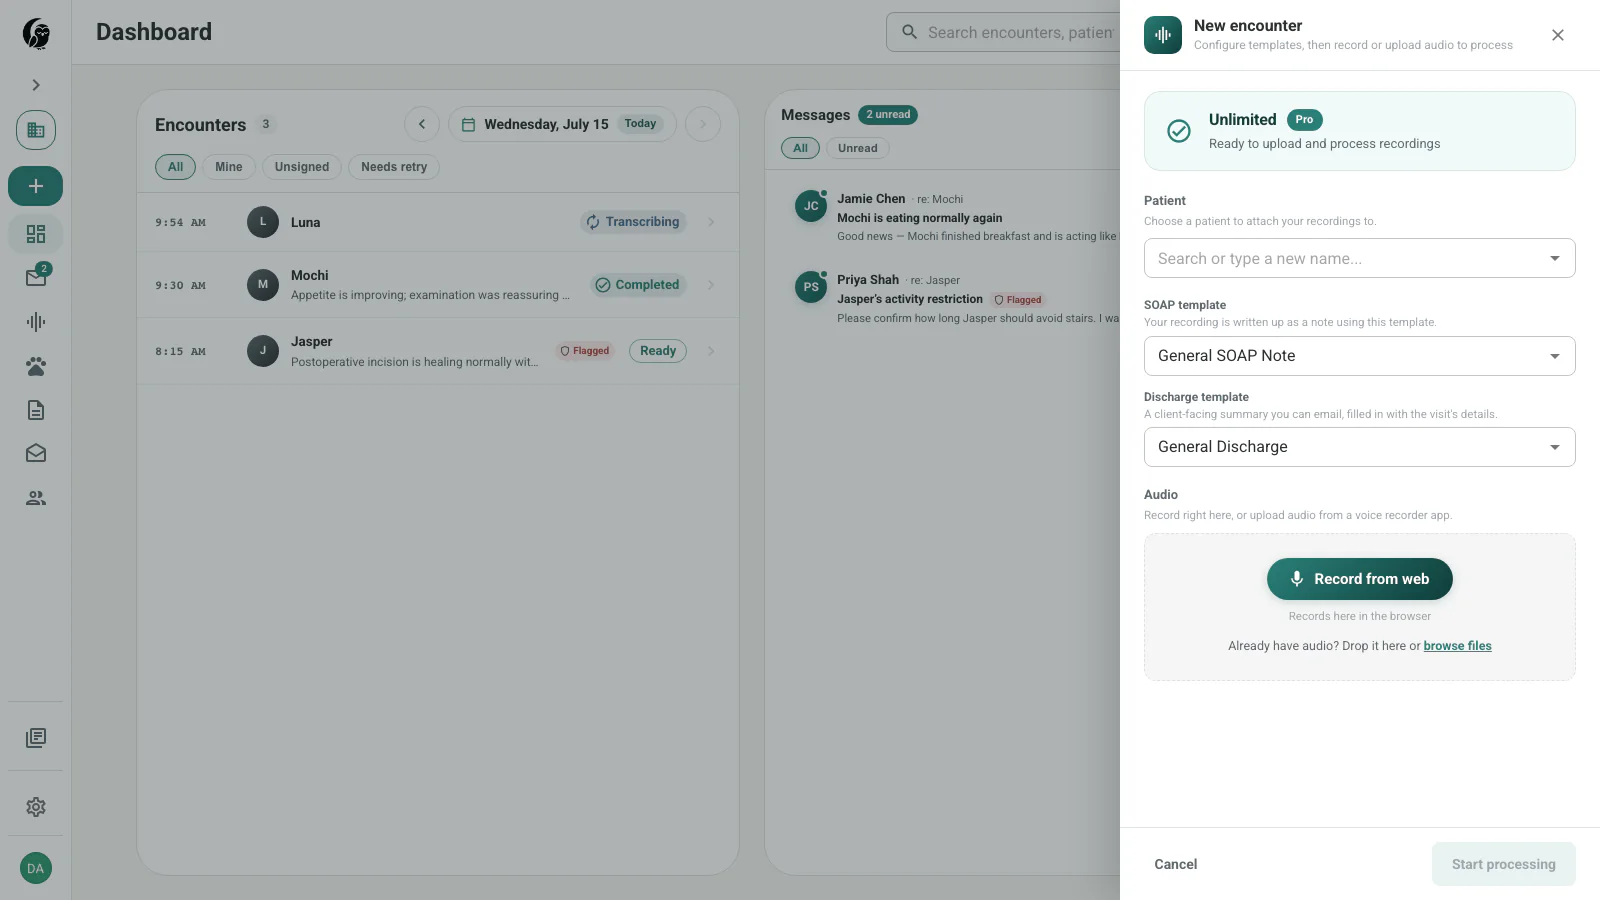
Start an encounter in noctune →
See New Encounter for the complete recording and upload workflow, including supported formats and limits.
Create a SOAP template
Open Templates, stay on SOAP Templates, and choose New Template. A SOAP template structures the internal clinical record: the clinician-facing note that noctune drafts from the encounter.
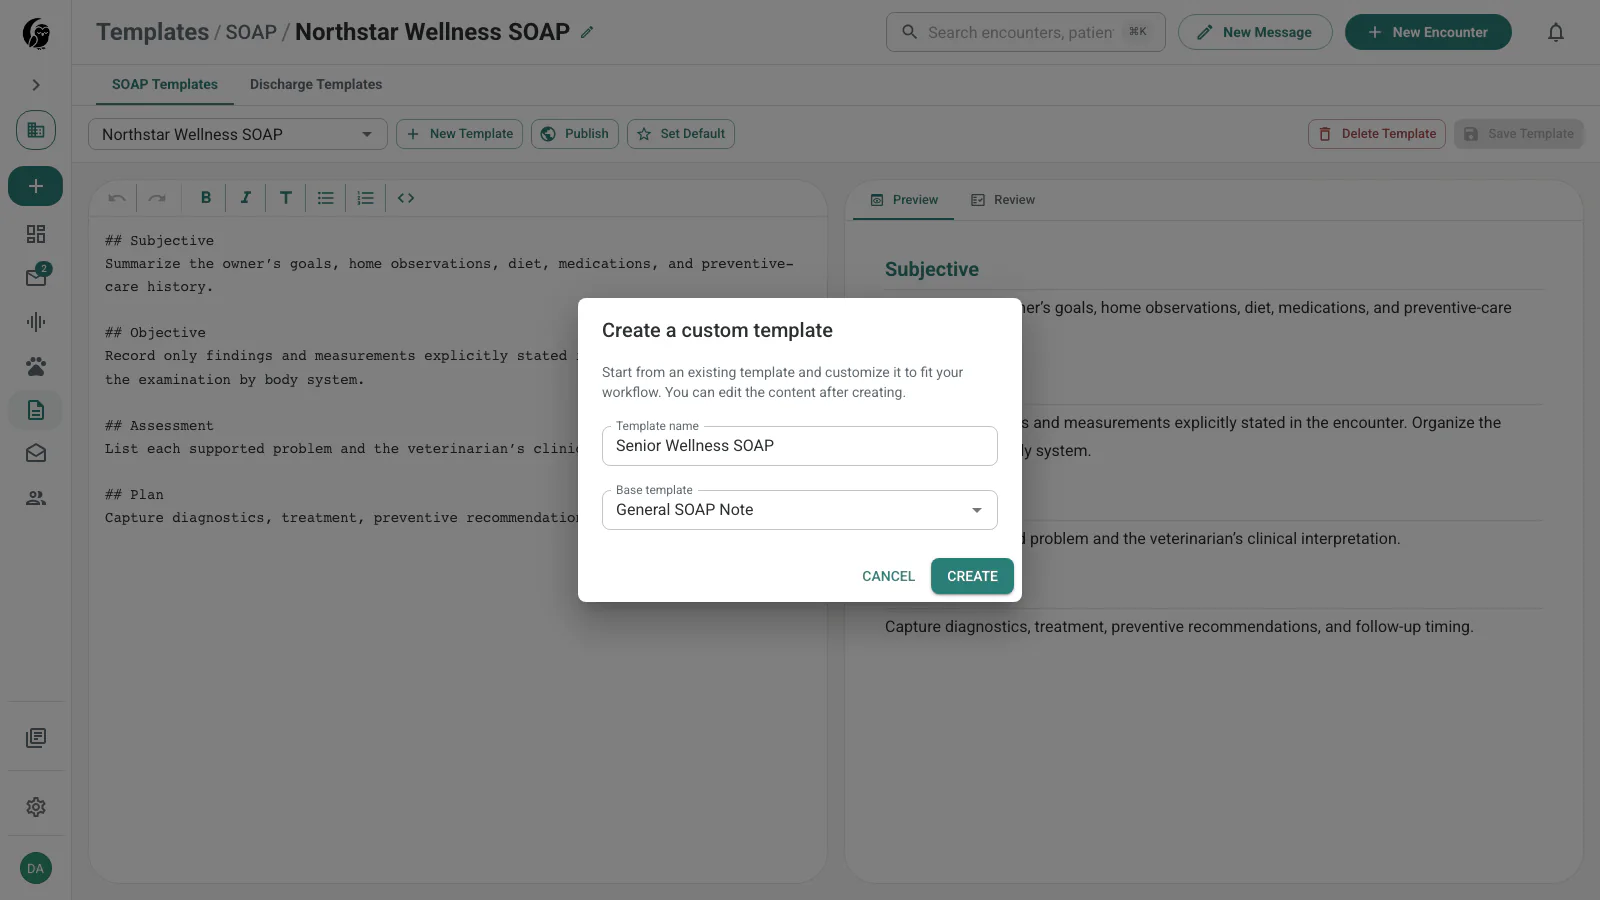
Create a SOAP template in noctune →
See Create a custom template for editing, saving, quality review, and template-writing guidance.
Create a discharge template
Open Templates, select Discharge Templates, and choose New Template. A discharge template structures patient-specific take-home instructions, such as medication directions, warnings, home care, and recheck timing.
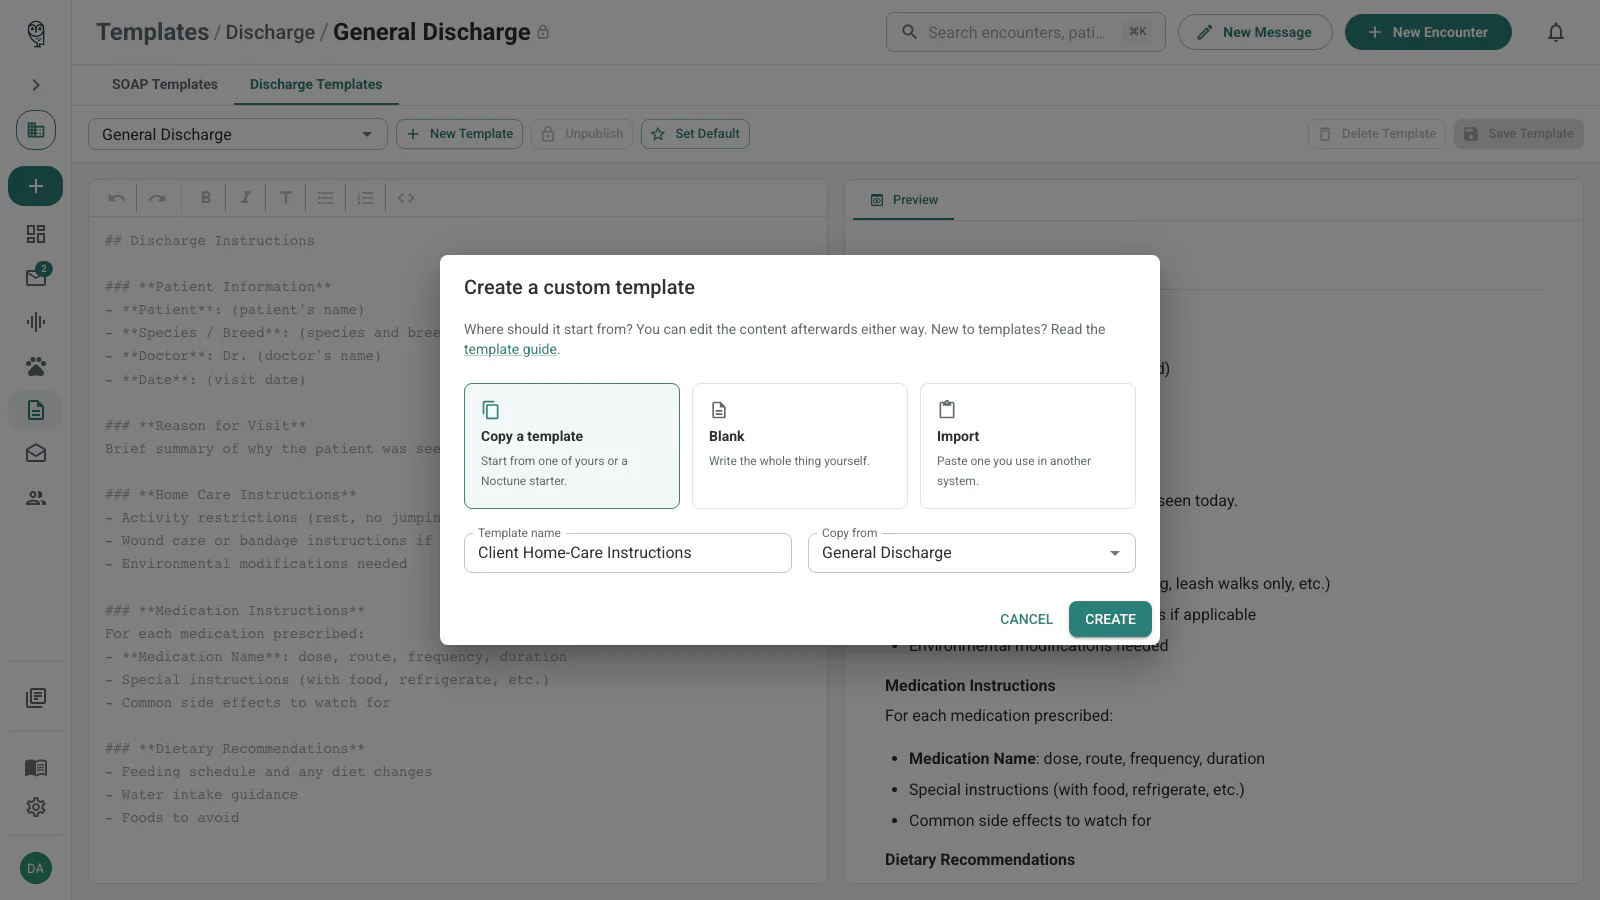
Create a discharge template in noctune →
Keep reusable education and delivery copy—client literature, greetings, cover messages, and signatures—in an Email Template. Email Templates are reusable message content; they are neither the internal SOAP record nor the patient-specific generated discharge.
See SOAP templates and Discharge templates for defaults, placeholders, and the full workflow.
Import an existing template
Already have a template from another scribe or practice system? Open Templates, choose New Template, and select the Import tile. Name the template, paste the complete source, then choose Organize this. The organizer is available to every authenticated user.
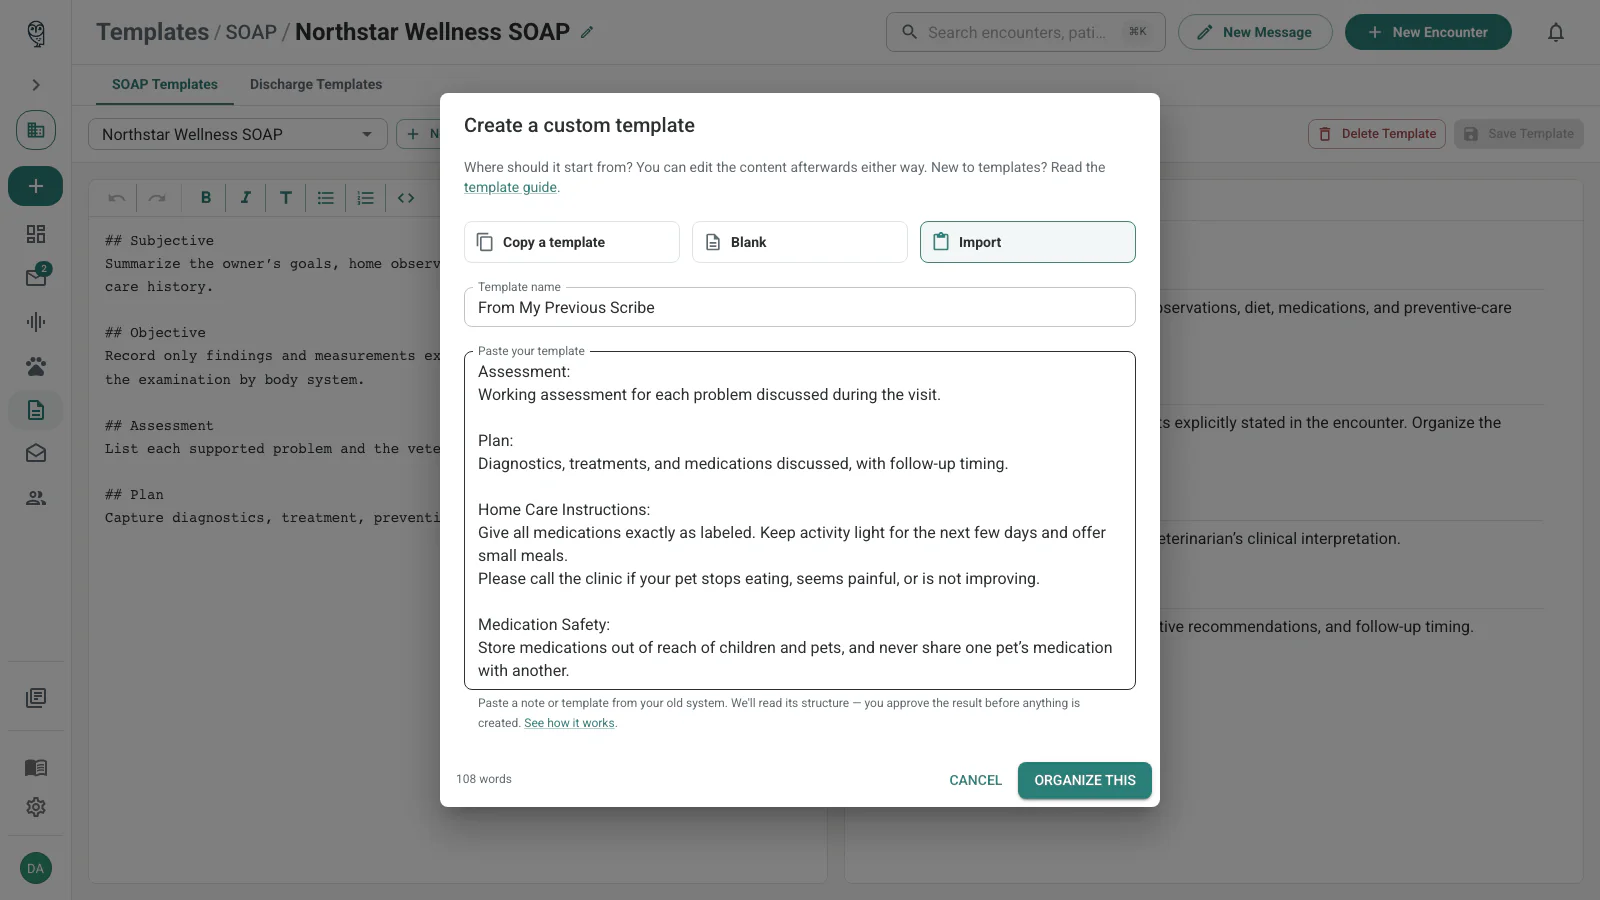
noctune reads the paste’s structure without rewriting it. Your full paste opens as an unsaved draft with Preview still selected. An import banner above the editor keeps View original paste available and shows anything that may belong in a template of its own—for example, client-facing discharge content inside a clinical template.
Choose Preview to inspect the exact proposed markdown, Create SOAP template or Create discharge template to save that companion draft and remove its matched source blocks from the current draft, or Dismiss to keep everything together. The receipt offers Open and Undo; Undo remains available only until you edit the current draft after accepting. If the banner flags client-education or unassigned passages, use View original paste to identify and preserve anything you need before accepting, then verify both drafts afterward. If analysis fails, the complete paste still opens unchanged so you can organize it manually.
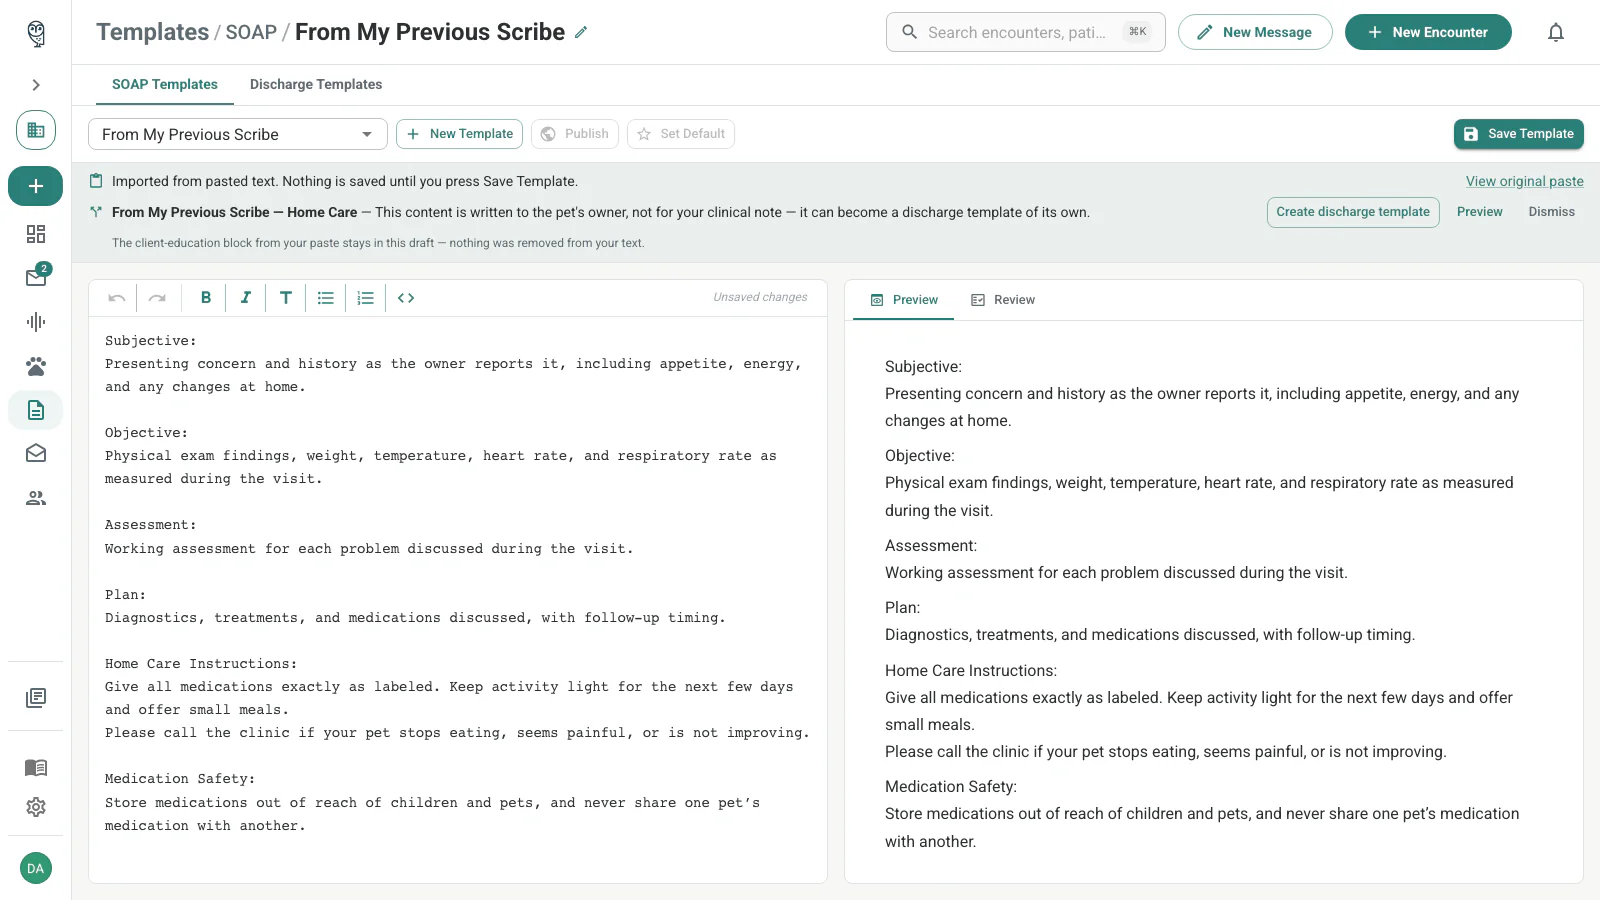
Import a template in noctune →
See Review an imported template for the complete proposal workflow and Choose the right place for each job for when content belongs in a SOAP template, a discharge template, or an email template.
Send a discharge
Open a ready encounter, review Discharge Notes, then choose Send Email → Send discharge notes. Add the recipient and send; noctune never sends a draft automatically.
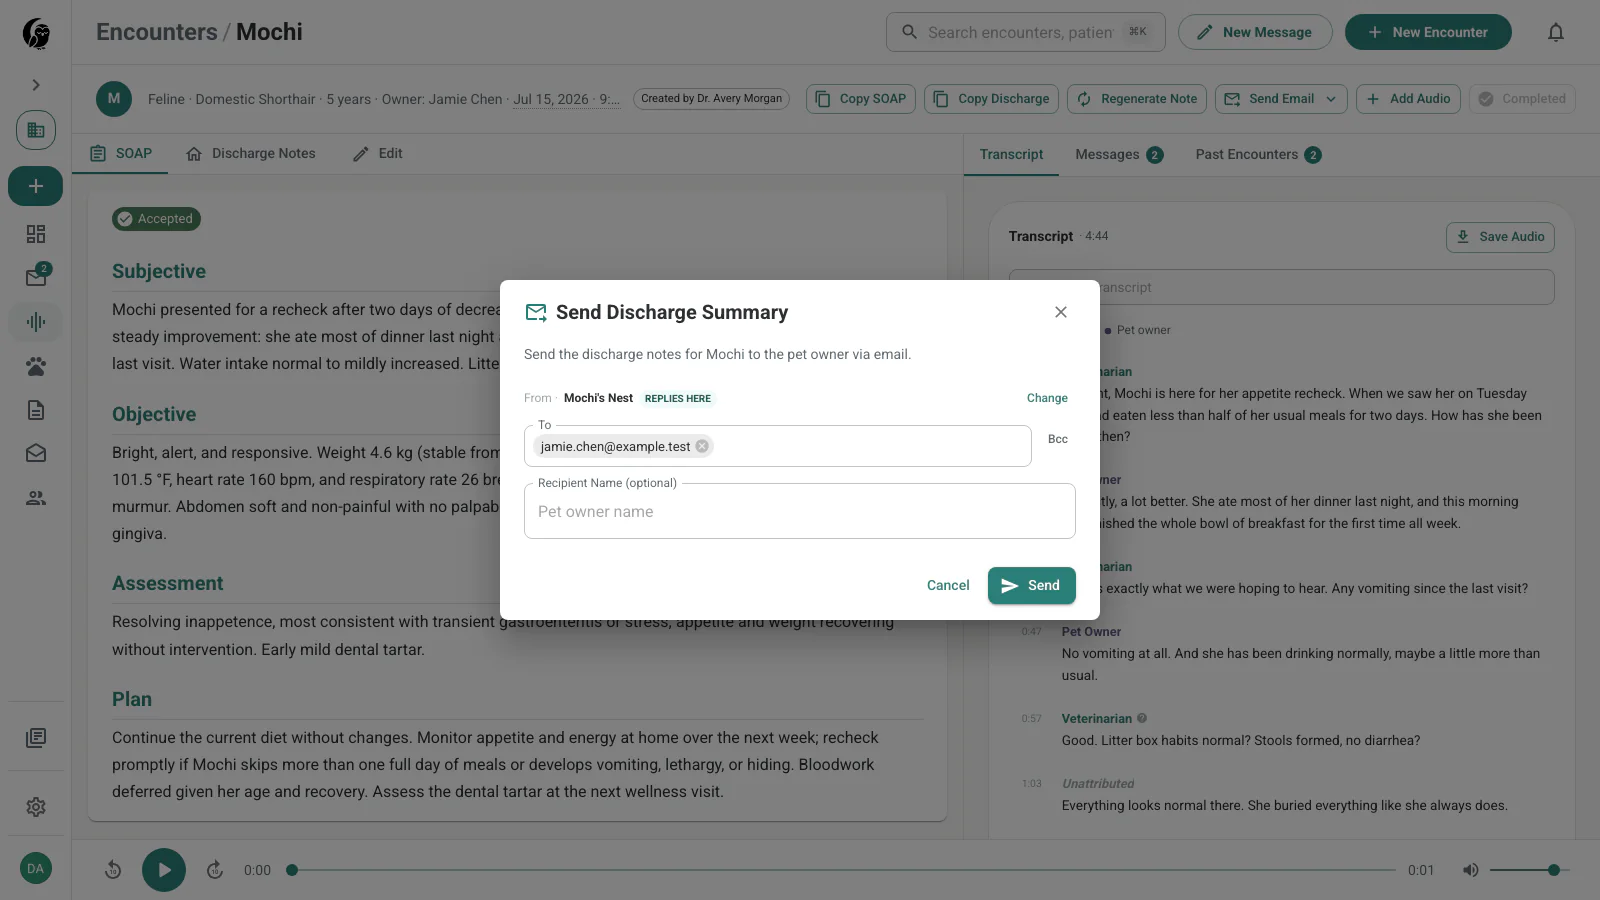
See Copy, email, and complete for completion behavior and sending options.
Go fullscreen
Open any encounter note and choose Full screen beside the View/Edit control. The note fills the window and hides the patient header and transcript; press Esc to leave. You can also use ⌘⇧F on macOS or Ctrl+Shift+F on Windows.
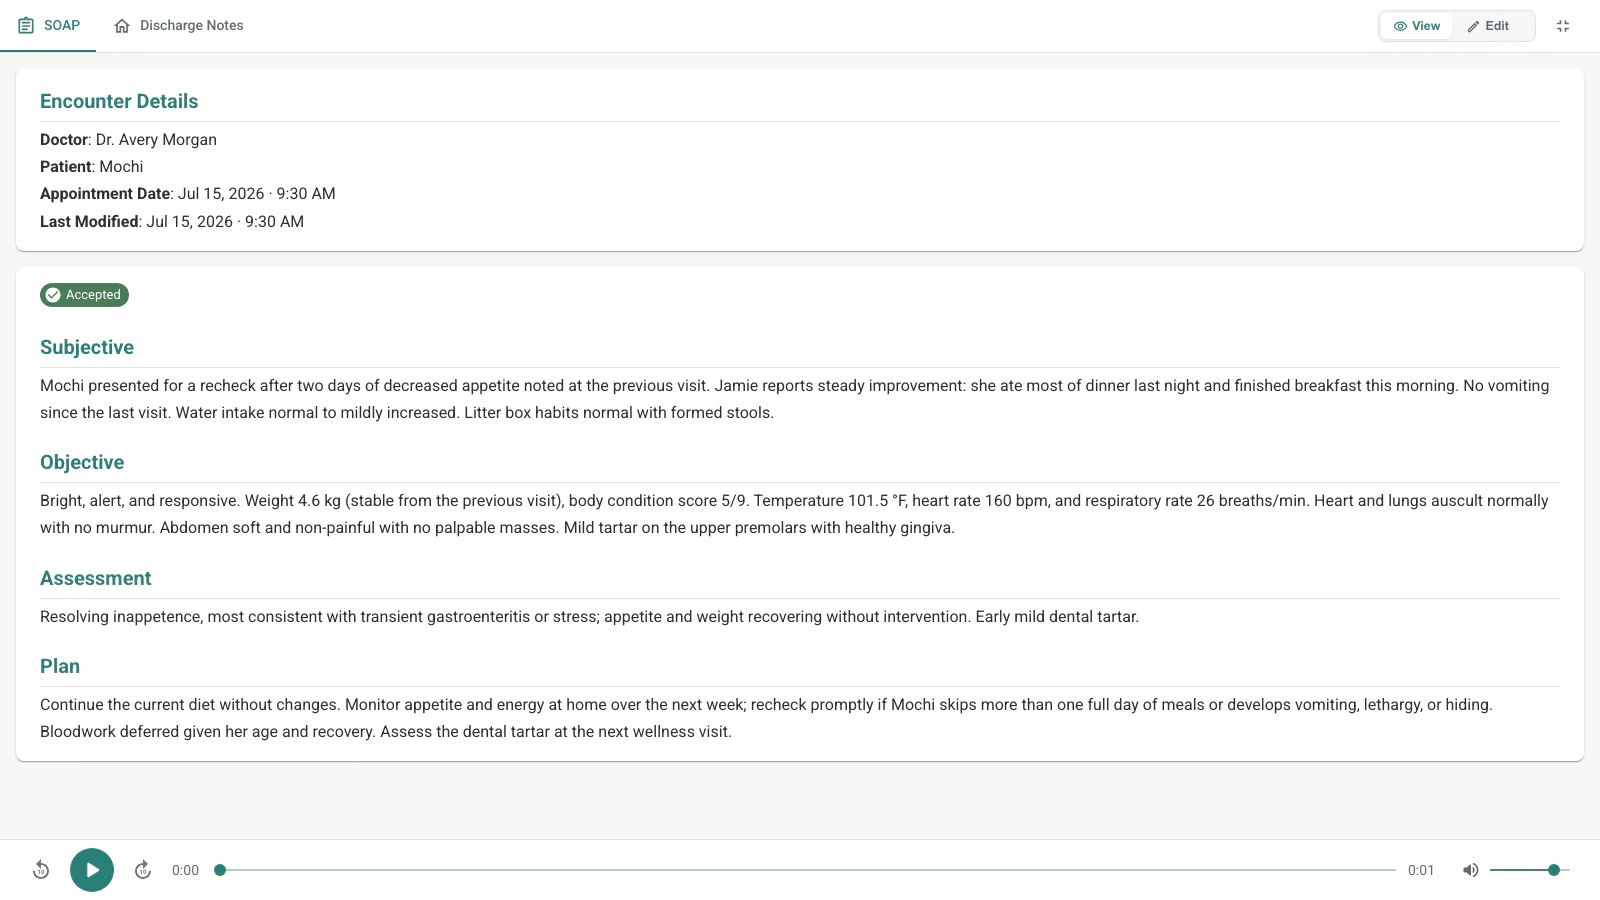
See Review & Edit for the complete note-review workspace.
Format with Markdown
Choose Edit on a SOAP note or discharge summary. The toolbar above the editor adds headings, bold, italics, lists, and inline code, or you can type Markdown directly. Choose Save when the note is ready.
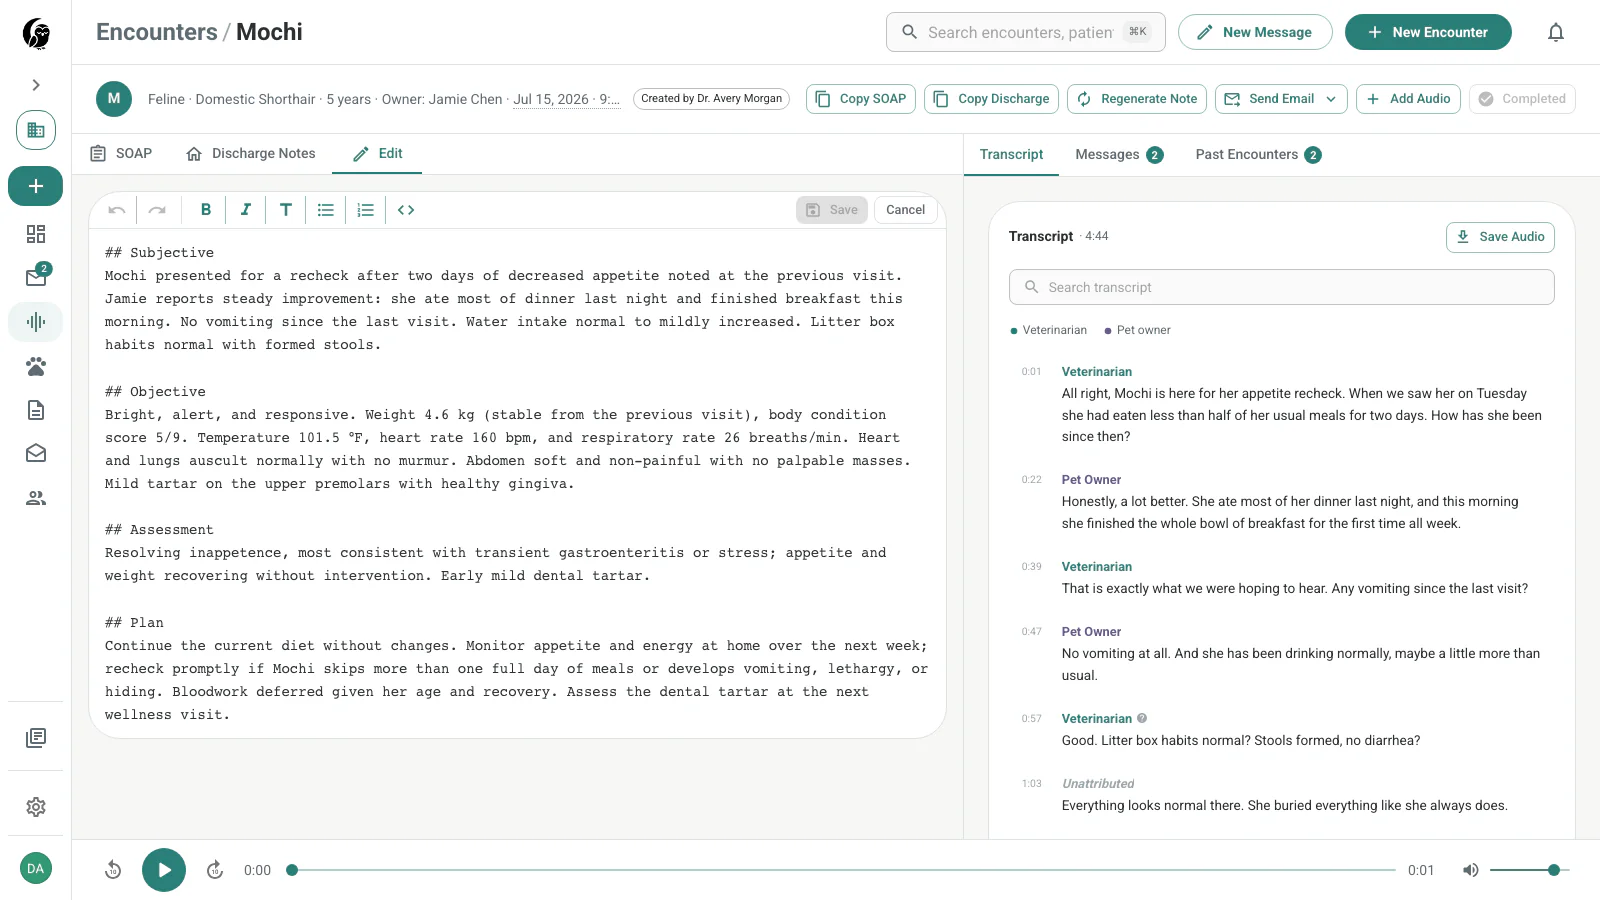
See Edit the SOAP note for editing and audited save behavior.
Meet your inbox
Open Messages in the sidebar to see client replies, their patient context, and assignment status. Use New Message to start a conversation; encounter-linked replies stay connected to the visit.
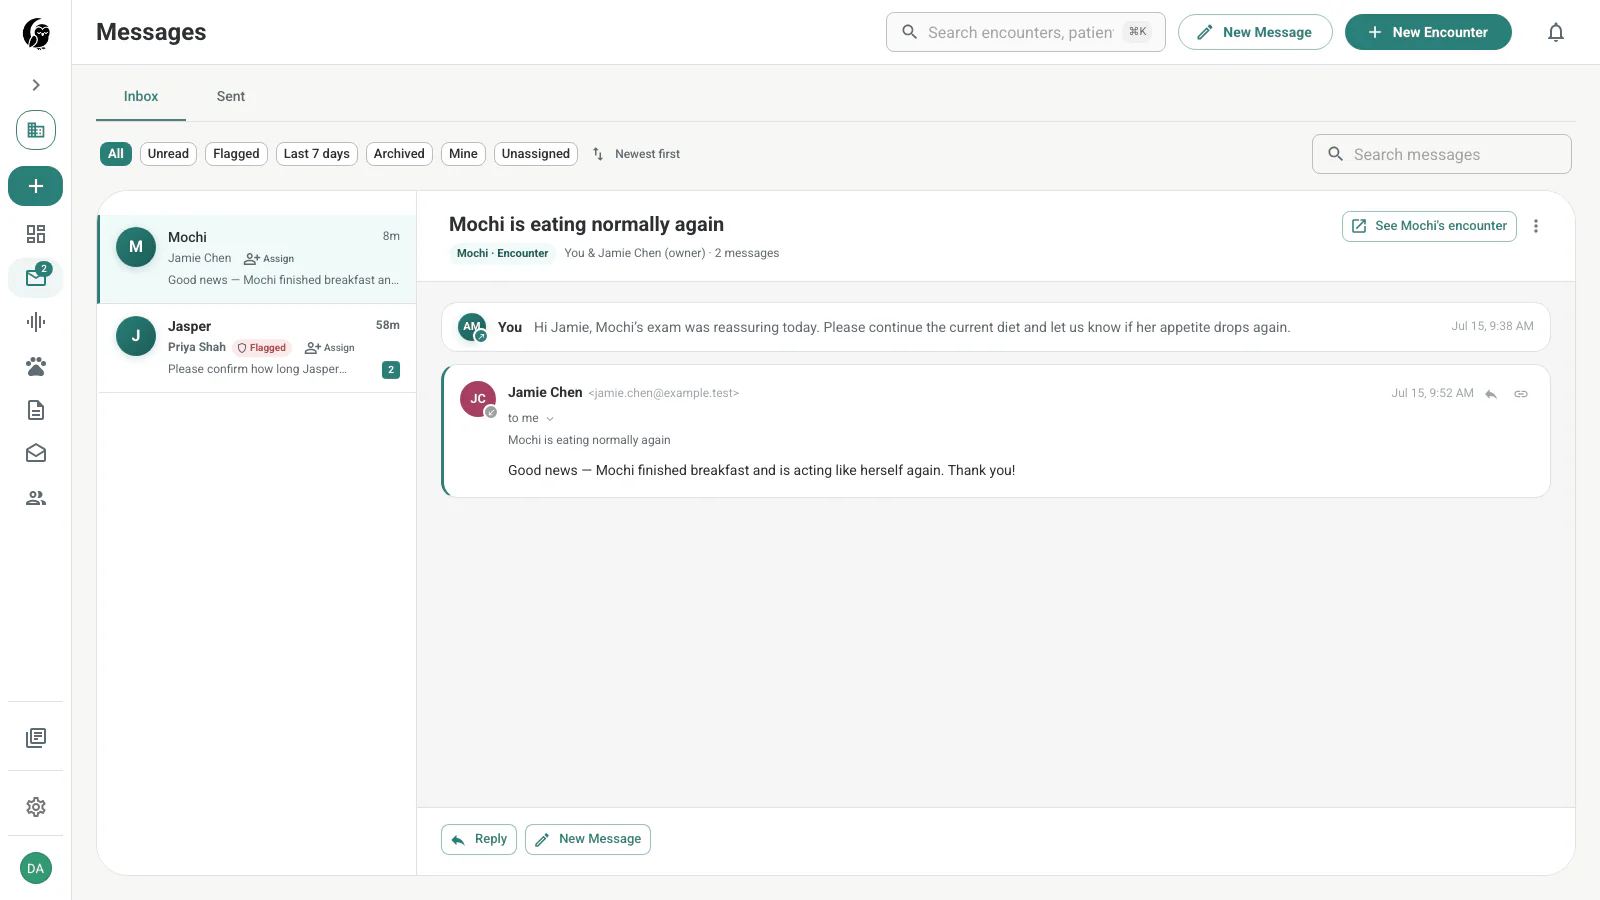
See Messages for inbox workflows and Messaging & Email Relay for delivery and reply routing.